A Detailed Guide on Nmap

Image source:Cover
In information security, "Information changes situations". In other words, collecting information and reconnaissanceis an important step in cybersecurity. It doesn't matter if you are sponsored state black hat hackers or pentesters and red teamersyou need to collect heavily every publicly or privately available information about the target organization. Once you have useful pieces of information you need to move on to the next step which is scanning. It is one of the most important operations in information security. It is gathering information about the connected devices in a specific network. In this guide, i want to take the opportunity to help you acquire a fair understanding of one of the most well-known network mapping and scanning tool. It is the famous "Nmap" weapon. This detailed guide is going to discuss the following points:
- What is network scanning
- Nmap Project
- How to install Nmap
- Targets
- Ports
- Service and version detection
- OS Detection
- Timing
- Nmap scripts
- Outputs
What is Network Scanning?
If you are familiar with my articles you will notice that before diving deep into the technical details i always try to start from the required basics and fundamental terms. First, let's explore where do you need "network scanning". Hacking (Black or white) goes through a methodological flow. Mostly, you need to follow these steps:
- Reconnaissance and information gathering
- Scanning
- Gaining access
- Maintaining access
- Clearing tracks
Network scanning can be found in the Scanning step. It is important to learn the difference between scanning and enumeration.
Nmap Project

Image source: Nmap logo
As a real-world demonstration to learn how to scan networks we are going to discover Nmap. The project's founders describe it as the following:
"Nmap ("Network Mapper") is a free and open source utility for network discovery and security auditing. Many systems and network administrators also find it useful for tasks such as network inventory, managing service upgrade schedules, and monitoring host or service uptime. Nmap uses raw IP packets in novel ways to determine what hosts are available on the network, what services (application name and version) those hosts are offering, what operating systems (and OS versions) they are running, what type of packet filters/firewalls are in use, and dozens of other characteristics. It was designed to rapidly scan large networks, but works fine against single hosts. Nmap runs on all major computer operating systems, and official binary packages are available for Linux, Windows, and Mac OS X."
How to install Nmap?
For the hands-on explanation, i am using a Debian machine. Thus, the installation will be easy. You just need to run (after updating the system):
apt-get install nmap

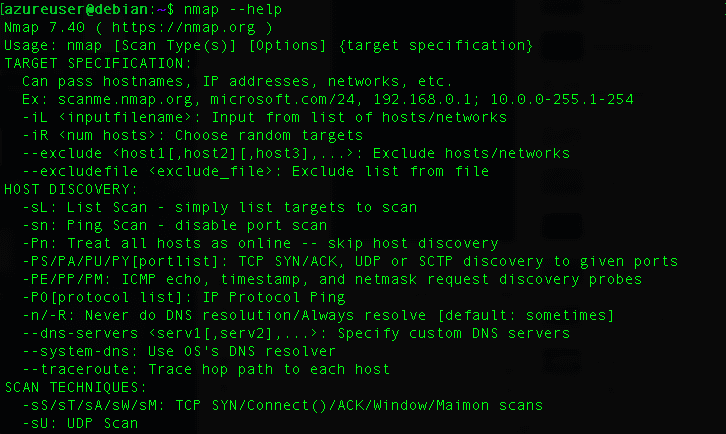
Voila! You installed nmap easily. To run it just type:
Nmap \<options> \<target>
You can install it for sure on many other different operating systems such as Windows.
Now, let's explore the power of Nmap. The first thing we are going to try is of course "Host Discovery"
As a target i am going to attack/scan an online vulnerable machine called "Metasploitable 2" developed by Rapid 7 and hosted on an amazing platform called "root-me.org"
Usually, we use an ICMP echo request to discover if a host is up or down (ping command as an utility for example). To discover live hosts with nmap type:
nmap -sn -PE -Pn 212.129.29.185

Our target is up!
Targets
In your network scanning missions, you are not going to scan only one host (IP address) but usually you need to scan ranges and many IP addresses. Nmap gives you the ability to do so by offering many easy options and techniques. For example to scan a range you can use the following trick
nmap 10.0.0.2-254
It scans 10.0.0.2 to 10.0.0.254
You can also use wildcards (*)
Nmap 10.0.0.*
Or even subnets:
Nmap \<IP> /24
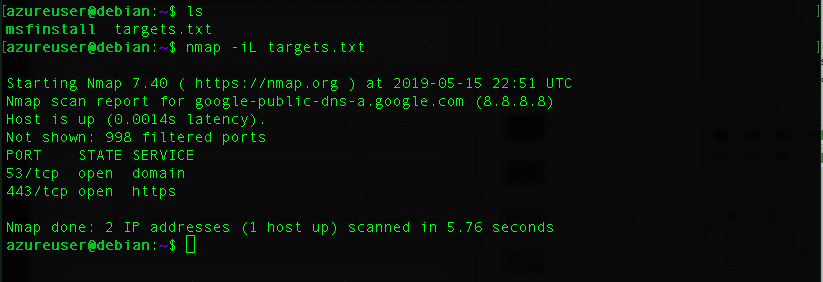
If you want to scan a list of IP addresses from a text file for example this file:

nmap -iL targets.txt
To select random targets you can use the -iR option
Nmap -iR \<num hosts>
To exclude a host you can type
nmap --exclude \<host1>
To scan a target with a specific network scanning technique (discussed in the previously discussed article) you need to use these commands:
- Ping: nmap -sP IP Address Here>
- Full scan : nmap -sS \<Target IP Address Here>
- FIN scan: nmap -sF
- XMAS scan: nmap -sP \<Target IP Address Here>
- NULL scan: nmap -sN \<Target IP Address Here>
- UDP scan: nmap -sU
Port status
By now, i bet you are wondering, "emm i am scanning networks but what information i need to perform an attack?"
You are right!
When performing network scanning in most cases we are looking for open ports. According to Wikipedia:
"In computer networking, a port or port number is a number assigned to uniquely identify a connection endpoint and to direct data to a specific service. At the software level, within an operating system, a port is a logical construct that identifies a specific process or a type of network service." Usually, port numbers are connected (logically) with specific services. Many ports are already reserved for some specific services. There are many port status that are described in details on the official documentation:
- Open
- Close
- Filtered
- Unfiltered
- Closed/filtered
- Open/filtered
Service or version detection
Let's find out what are the open ports on our target metasploitable. BTW, you can download the "Metasploitable 2" on a VM and practice with it directly on your computer.
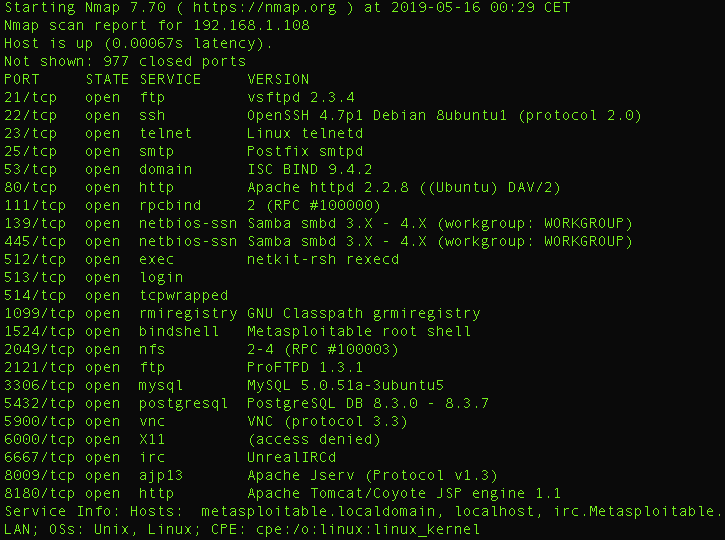
Let's run a service detection command with "sV" option
nmap -sV 192.168.1.108
The following screenshot illustrates all the open ports including the running services on the target
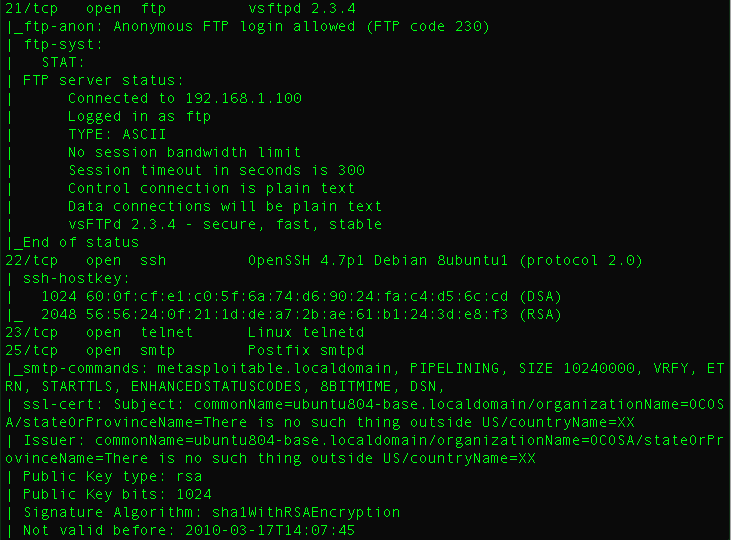
To collect more and detailed information about the services add "-v" option.
OS detection
Now let's try to detect the running operating system. The trick is easy just run
Nmap -O 192.168.1.108

Timing
Nmap delivers what we call "Timing templates". There are 6 templates; paranoid (0), sneaky (1), polite (2), normal (3), aggressive (4), and insane (5). Timing templates are specifying how aggressive a scan is for many purposes including intrusion detection evasion.
For example, this time is used the "T4" template and "-A" (operating system detection) to perform a scan
Nmap -T4 -A 192.168.1.108

Nmap Scripts
Nmap is so powerful. It gives you the ability to write your own scripts thanks to its engine. It is called "Nmap scripting Engine" (nse). To write NSE scripts you need to explore the Lua Programming language.
The are many premade scripts when you install nmap. Let's explore some of them:
Find MySQL info:
nmap --script=mysql-info.nse 192.168.1.108

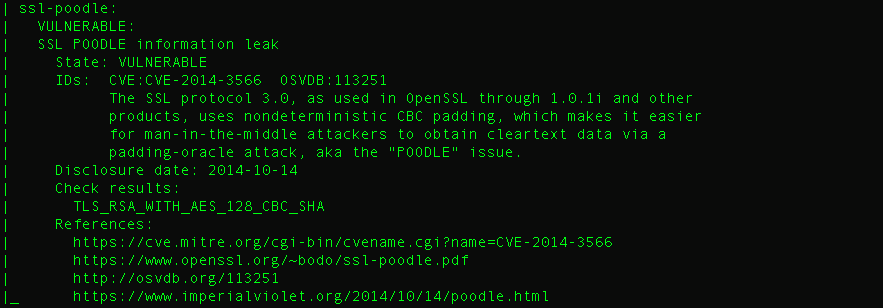
To check if the target is vulnerable to ssl-poodle use this command
nmap --script=ssl-poodle.nse 192.168.1.108
There are many other nse scripts you can try like:
- Http-enum
- Http-wordpress-brute
- Http-title
- http-waf-detect
You can find all namp scripts under: /usr/share/nmap/scripts/ (on linux)
Outputs
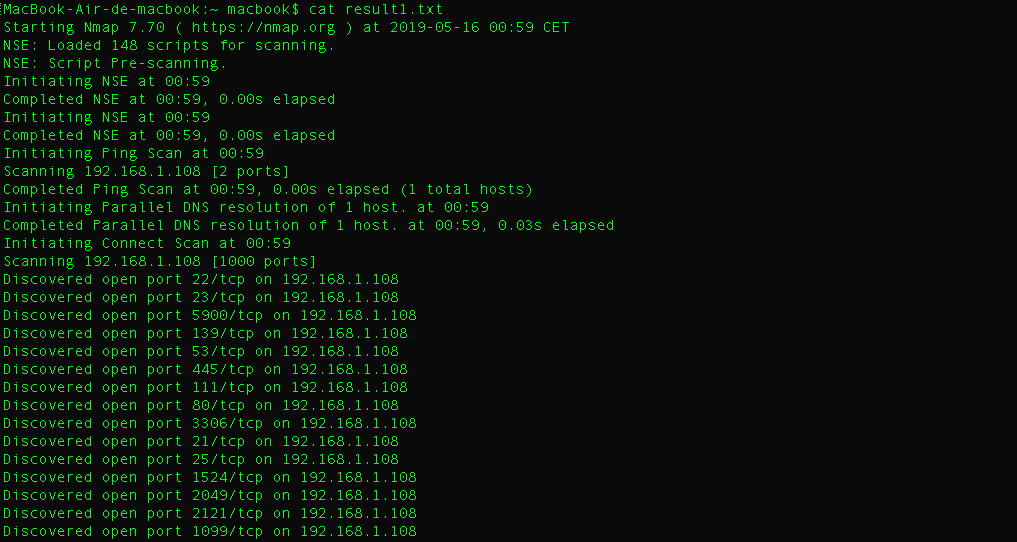
To get the most of your scanning efforts you need to save the collected information. You can save the results easily with Nmap. To save the results as a text file type:
nmap -A -T4 -v 192.168.1.108 >> result1.txt
Or you can use "-oN"
nmap -A -T4 -v 192.168.1.108 -oN result2.txt
To save the report as an XML file type:
nmap -A -T4 -v 192.168.1.108 -oX result3.xml
There are other reporting options like:
- -oS
- -oA
- -oG
By now you acquired a good understanding of network scanning with nmap. If you need me to correct or modify something please leave a comment below.
I am going to add more techniques to this guide in the next days.
Thank you and i hope you found it helpful.